
 732
732
Follow these steps to upload library documents.
Please Note: We have a 10MB per document limit for all documents loaded into the library.
To be able to upload documents that are oversized, you will need to compress them. This link contains a tool that will compress your document. http://help.buildinglink.com/tips-to-make-your-files-smaller
To upload a Library Document, simply follow these steps:
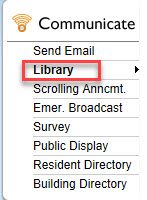
1. Click on the Communicate Tab, then select Library.
2. Click the green Add New Document button at the top right of the screen.

3. Complete the Title - This will display as the document name for residents to see so make it something that makes sense.

4. File it into the appropriate Category from the drop down list.

5. Choose who you want to be able to see this document.
All occupants means everyone in your database;
Specific Occupants brings a further list of choices for occupant types. You can use this if you only want to the Owners to see but not the tenants, for example.

Committee means residents with Committee permissions will be able to see the documents.
Front Desk and Maintenance are employee access levels and if chosen, those employees will be able to see the documents.
If you do not select any viewing options, then only staff with Management or Security Officer level access will be able to see the file. (To see which staff have which access levels, click the Manage Tab, then Employees).
6. You can add a document date if you want. The system defaults to the date it is uploaded, but you can amend that to the date of document creation if more appropriate.

7. If this document has a limited useful life you can set the date that it is to expire. If you do the document will no longer be able to be accessed past that date set. It isn't mandatory though.

8. If the document carries high importance you can flag it as such.

9. Press the select button to find where the document is stored on your computer for uploading. Alternatively you can drag and drop the document right next to the select button.

10. If you have web page that you want to refer people to that can be added.

11. If required you can add further text in the document text field. This is optional.

12. Choose if you just want to Save the document or if you want to Save & Notify. If choosing this second option another screen will open showing the email message that will be sent to all recipients associated with the viewing permissions that you have set. For example, if you chose the Maintenance Dept for viewing, then an email will be sent to all employees with Maintenance level access to the system.

That's all there is to it.

